Good morning from my Covid sanctuary. In a quest to keep occupied and as far from insanity as possible I have cleaned all closets and drawers and repurposed spaces I have not found a use for in 42 years of living here. Then it occurred to me that I have not posted in a LONG time and I can do that instead of cleaning. Stay tuned for more from "Wits End".
Monday, December 7, 2020

Tuesday, August 14, 2018
I have been busy this summer crafting. Here is just part of what I have been making. The little lanterns in the front are going to be made up in mostly Fall colors to grace the mantle. They look especially cute with a battery operated candle in them. The squares to the right are the perfect size for a gift card or some tea or hot chocolate. Busy busy busy! Being the spinners which I did not make are three four inch sweaters I am making for our grandchildren for their 2018 Christmas ornaments.


Good morning! It is August in Illinois and delightful to be able to hide away in an air-conditioned room and play.
I am still working on my penmanship. I am up to the letter P. I am mostly satisfied with the alphabet I have designed so far. Still not perfectly happy with the B. I will keep working on that. In the meantime I have been experimenting with partial die cut and came up with something that I think would be useful to share.
I have`found that as much as enjoy making this slider card the center portion is a pain to cut either with an exact or a paper trimmer. I have seen that there is a very nice die cut available for cutting this center. While watching a video on that die it occurred to me that if I used a rectangle die which I already own I could use the partial die cut technique on one end and cut a perfect center opening any size I have a die for already.
 Here is the card as it looks before I start decorating it.
 A few decorations and it is ready to send.
 Here is a picture of the front of another card getting ready to have the center cut. You will see that the top plastic cutting piece stops before cutting through the top of the card. Easy peasy and you have a slider card in just about any size you can wish for. This one is a 3x4 1/2 base The center die making the opening is, 3 3/8 x 2. Sometimes I mount this on one piece of card stock. This on is on a folded piece of card stock measuring 6x4 1/4.
 I hope you find this useful and the idea simplifies your slider card production.
I am still working on my penmanship. I am up to the letter P. I am mostly satisfied with the alphabet I have designed so far. Still not perfectly happy with the B. I will keep working on that. In the meantime I have been experimenting with partial die cut and came up with something that I think would be useful to share.
I have`found that as much as enjoy making this slider card the center portion is a pain to cut either with an exact or a paper trimmer. I have seen that there is a very nice die cut available for cutting this center. While watching a video on that die it occurred to me that if I used a rectangle die which I already own I could use the partial die cut technique on one end and cut a perfect center opening any size I have a die for already.


Sunday, June 10, 2018

Wellcome to the summer 2018 calligraphy challenge. The art of beautiful handwritten messages is being lost in the technology of today. So I challenge you to find a style you like and to work on it for about 20 minutes a day so that by the time summer is gone you will feel comfortable addressing an envelope in your own beautiful hand. I was so lucky to have a neighbor growing up who could make a paper bag look like a work of art. She had an individual handwriting style that I have always been fascinated with learning. I have two copies of her letters to use as a guide and will fill in with my own for the missing letters. My thanks to her, Helen Gard Hanes for her willingness to share her art with me over the years.
Youtube has many videos that demonstrate using Crayola markers. I am starting with those but might also use calligraphy pens from my college days if I can get the dried ink out of them and get them flowing again. Anything you have handy will work for practice. One teacher at Drake University made us go out to the quad and find a stick and sharpen it and use it for our writing. I don't recommend it but it can be done with a nice bottle of India ink and maybe some wine. The more practice time you put in the more you will want to use more expensive pens. Just remember that as in anything you want to master in life, practice makes perfect.
I will not be giving lessons here. You will be keeping track of my progress and that will keep me practicing. As you can see from my start page I do not do this well. I am determined to improve.
Looking forward to seeing your calligraphy art work'
Wednesday, October 25, 2017
Good morning!
Today I am going to share a little invention I came up with to keep track of people who ask for prayers. I am terrible with names and when someone asks for prayers I like to think I can keep track of at least their first name. Sometimes people ask for prayers for someone and they would like to keep that persons name confidential. I call those people Mary and Joseph. God knows and that is all that really matters. The request for a system to keep track came from a dear friend who never carries a purse. I am always amazed at what she can pull from the back pocket of her jeans! This looks like it is going to work for both of us. You could also use this system for keeping notes on books you have read or recipes people share. It has to be better than a purse full of receipts from the store with addresses and recipes written in pencil on the back!
Here goes:
Suppose:
long legal size envelope
pretty paper for back and front
glue or tape
blank card weight paper
scissors
cutter
ruler
pencil
small circle punch
small circle punch

Remove the tape or lick the envelope closed. Fold it in half with the sealed part to the inside.

Someone should have cleaned off their table before taking pictures! Tape the top edge of the envelope closed about 1/8 of an inch from the top. Using scissors or your cutter trim off that 1/8 edge that is not glued. Now you can see the pockets we are going to use for our cards.
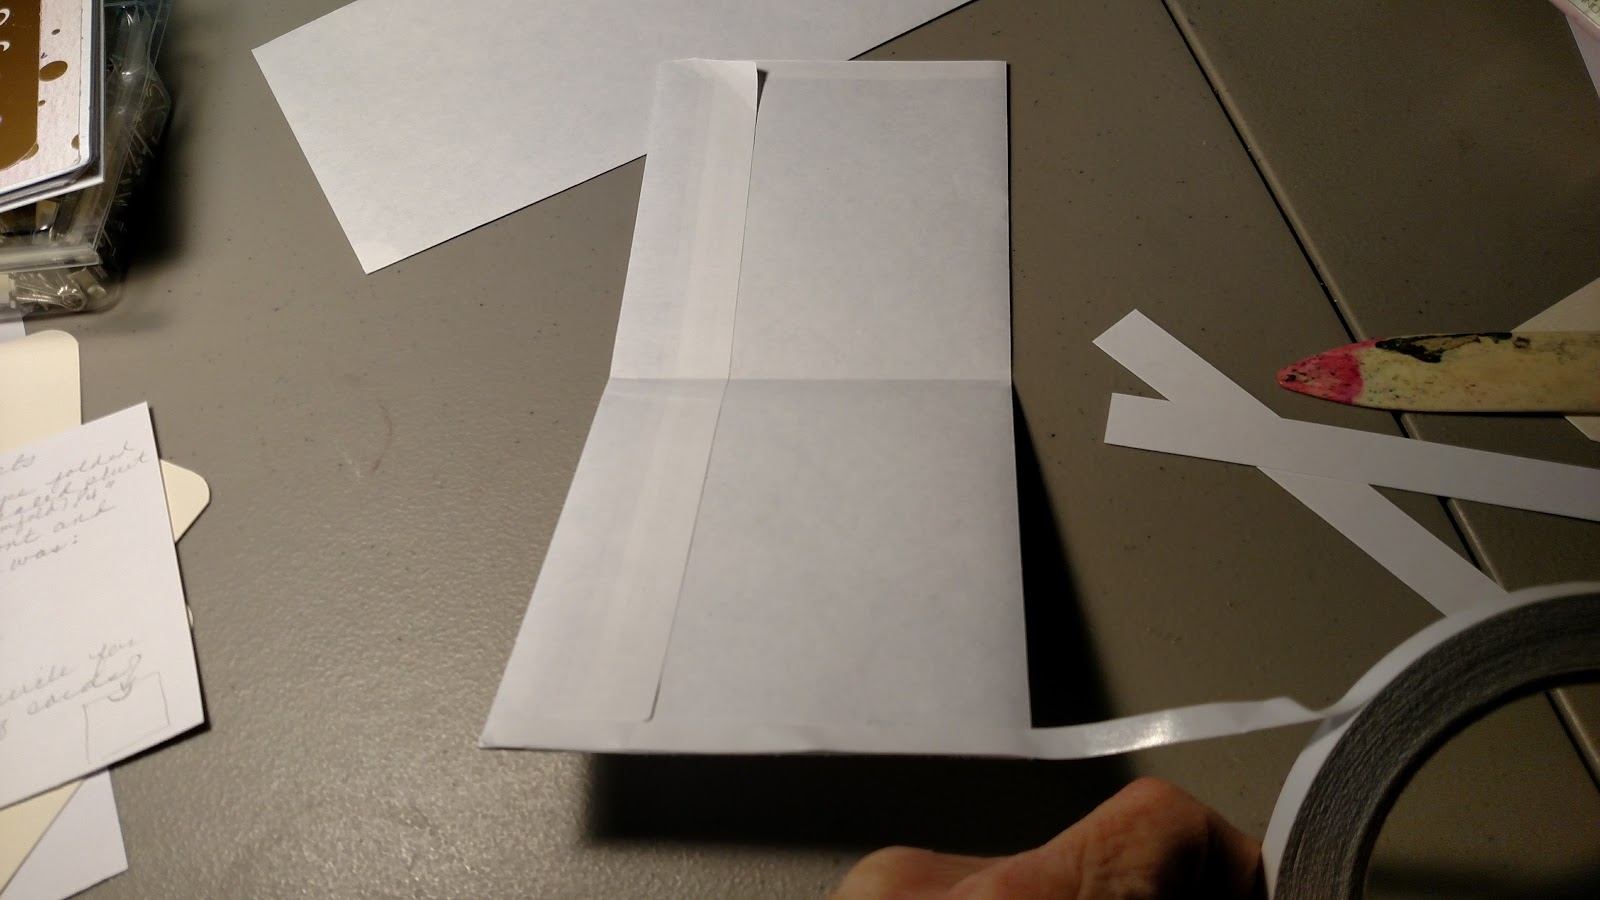


Take your rules and find the center of the top edge and using a small circle punch make half circle in the top so that you can easier have access to the cards that will be in the pockets when we are done.

Cut the paper you have chosen into 4x 4 1/2 . You will need two of these. One for the front and one for the back. Glue those in place. I recommend double sided tape. Glue stick and white glue work but use it sparingly so the paper does not wrinkle.

Now we need to make some cards to slide into the pockets. I made mine from white yardstock I buy at Walmart. It is a good weight and the price is right. The cards need to cut 4 x 4 3/4. I had a corner rounder handy so I rounded the corners to make it easier to slide the cards in and out. You can trim yours down on the 4 inch side if they are too tight or you need to carry a lot of cards in your pocket.
The paper pack I got on sale at Joanns had a sheet with sayings on it that I cut apart for decoration. I also had a stamp that said "Praying for You" from Stamping that perfectly fit the theme.

Now comes the test of time. Mine is going into my purse and my friend will slide hers into her back pocket and we will see how that hold up. I kept the decorations at a minimum for my friends Prayer Pocket. That will make it easier to slide in and out. I will let you know how this works our.
Sunday, September 24, 2017
One Sheet Mini Albums
Inspired by this very nice pdf sheet from Maymay Made It blog I have had the nicest time getting re-
acquainted with felxagon books. Check out Maymay's blog or you can watch her make a sample of one of these books on Youtube. The segment is called, On Sheet Mini Albums.

Maymay has done a great job with these directions if you want to save a lot of time cutting the layers
for your


Carol Duval's new craft book called, Paper Crafting with Carol Duval has samples for little one page books. MISS YOU CAROL!
Sunday, September 17, 2017
Lawn Fawn shadow box die

This little box is from Lawn Fawn and it so easy to assemble. For this Halloween card for my grandchildren I added a little pocket in the back of the card for some spending money. The box lays flat for mailing, The little trick or treaters are from Lawn Fawn also and were colored with Spectrum Noir Alcohol Pens. The spider web is from Cricut which I still love to use! The directions for the box are on Pinterest and YouTube in case you do not have access to the Lawn Fawn dies. Paper Boutique in Springfield, Illinois has a full collection of these dies and is happy to do mail order. This card fits in to an A4 envelope or the invitation envelopes that are available from Walmart.
This is what the box looks like when flattened for sending through the mail.

Tuesday, August 29, 2017
Saturday, October 27, 2012

Letterpress cards for Halloween 2012A
Halloween cards are part of the fun of the season. Here are my 2012 cards. I used the Letterpress L by Epic for the background...note it is in two colors! The spider web and the greeting were also Letterpressed. It is a fun process. It requires you to think about placement and design before you begin printing. Once the items to be pressed are in place it is time consuming to move them around.
 If you like the design it could be easily done in stickers or stamps. The bat is a sizzix die.

Tuesday, August 21, 2012
This is an example of a finished travel or journal folder. At the most the original folder will cost no more than 20 cents. I used stiff cardstock to make my inserts for the pockets and random pieces of paper and stickers to decorate the outside and the inserts. It is an easy journal to make and very uncomplicated to use when traveling. A small bulldog clip will keep the pages and the odds and end you collect from falling out. 

 With just a few simple folds we will turn this folder into a great travel journal. Open the folder up and if you would like you can spray paint the white parts or just leave as is. Pick up your folder and crease in the center so the front and back covers meet.
  This is a penny two pocket folder from Staples.
Sunday, May 27, 2012

Now I am going to make some booklets out of file folders...if I can just find the directions.
Thursday, March 22, 2012
new version of the bunny bags
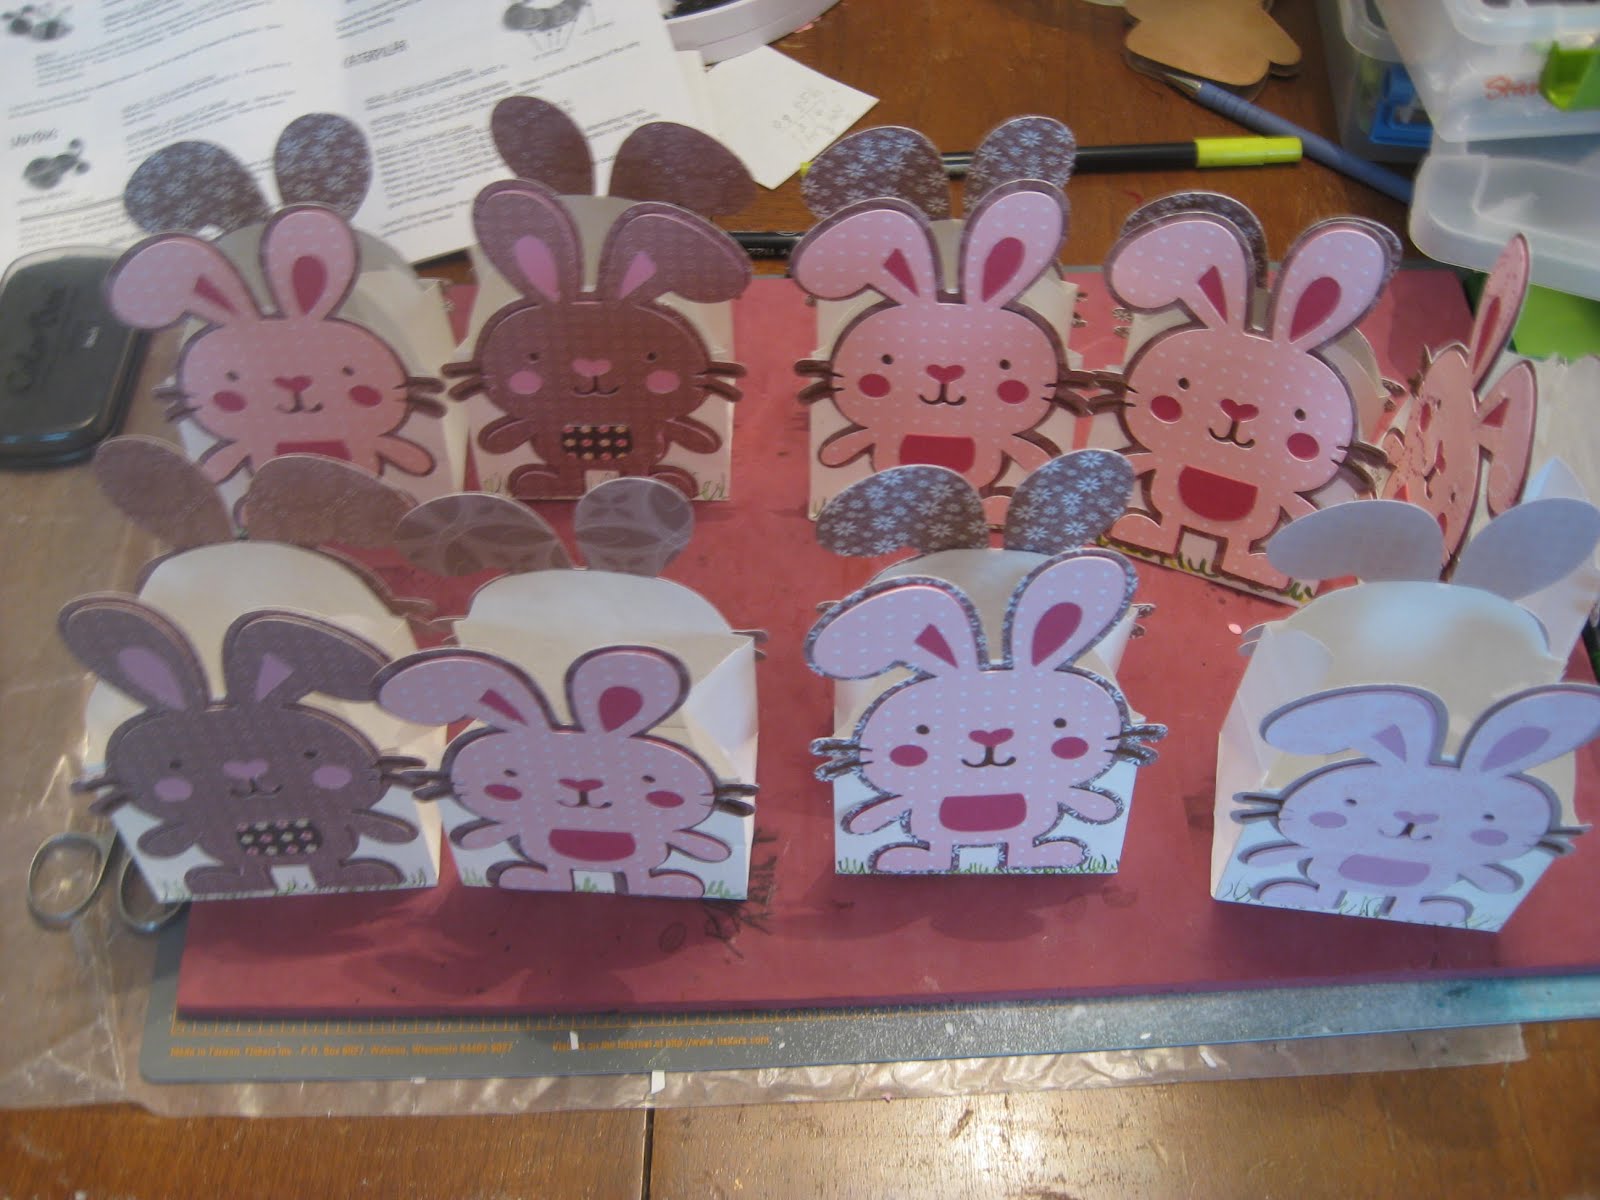

Here are the bunnies all in a row made with the Cricut Create a Critter cartridge in 5" size. I was able to find treat bags to cut down to make the basket part between the bunnies. I also have some wild green grass and candy to fill them up and cellophane bags to drop them into for presentation.
Monday, February 20, 2012
Now for something entirely different


 This has been such a delightful project. This is by Kaisercraft and it is called a mini cubby. There is some basic assembly to do and then the fun begins. This is probably going to be the color that my box remains but it definitely is not the first color I painted it! The box itself is very sturdy and takes a lot of painting and cleaning and painting over without warping. The nine little boxes are a bit more fragile but still study enough for a lot of painting and gluing. The company even included an extra box to use if you have a problem or for a template for cutting the paper for the front. I just papered the front but you could do all four sides and even the bottom. I thought it might slide easier without the paper on the sides. I am still working on the top. I think I want it to look like a meadow with a birds' nest which I will build out of bits and pieces from the yard. This kit cost less than $15. to buy and provided me with hours of entertainment. I can hardly wait to start on my next one. This time I will paint all the parts with a color and make sure I am happy with it before assembling. Kaisercraft has several kits along the lines of this one.
Saturday, February 11, 2012
Dapper Dillinger Trousers
My first real sewing project of the year - Figgy's Dapper Dillinger Flat Front Trousers! Emmett's favorite color is green so I made these for him out of a light weight green corduroy with a contrasting patterned corduroy. My model was very busy playing soldier / rock star but was happy to add these pants to his ensemble. They are actually long enough but I had to tuck the shirt in so you could see the lovely flat front of these pants and that really yanked them up.


Thursday, February 9, 2012
Wreath from Molly's design


 Look from bottom to top since I am never going to get used to adding my first picture last! The hard foam wreath was crocheted to cover with brown and a varigated green yarn. Next a LOT of tiny shamrocks were cut using the Sizzix Big Shot in a dark and light green felt then in four different patterns of fabric. It was fun work and even more fun with help from Carrie. After trying all sorts of patterns I decided on a light to dark transition from the outside to the inside of my wreath. Each shamrock was then pinned with a headed pin into the wreath form. Some tiny bows in green were added for accent. Love the design Molly. Thank you so much for such a pleasant craft project.
Subscribe to:
Posts (Atom)